How to Insert Checkbox in Excel?
The article in this webpage describes how to insert checkbox in Excel step by step.
Watch the Microsoft Excel tutorial videos at Rath Point’s official YouTube Channel. Subscribe to our YouTube channel to know the latest updates, tips and tricks.
Microsoft Excel is a spreadsheet application that provides the users with lots of features and the checkbox is one of the useful feature. The Excel checkbox is a quare box where the user has a option to tick and untick it. Now let’s learn step by step how to insert checkbox in Excel.
How to Show the Developer Tab in Excel Ribbon?
The checkbox feature is available under the Developer tab in Microsoft Excel. If the developer tab is not visible in your Excel then follow the below steps to show it:
- You can right click anywhere on the Ribbon and select Customize the Ribbon option. Or go to File tab → More → Options and click on Customize Ribbon.
- Then under Customize the Ribbon, make sure the Developer box is ticked as shown in the below images.
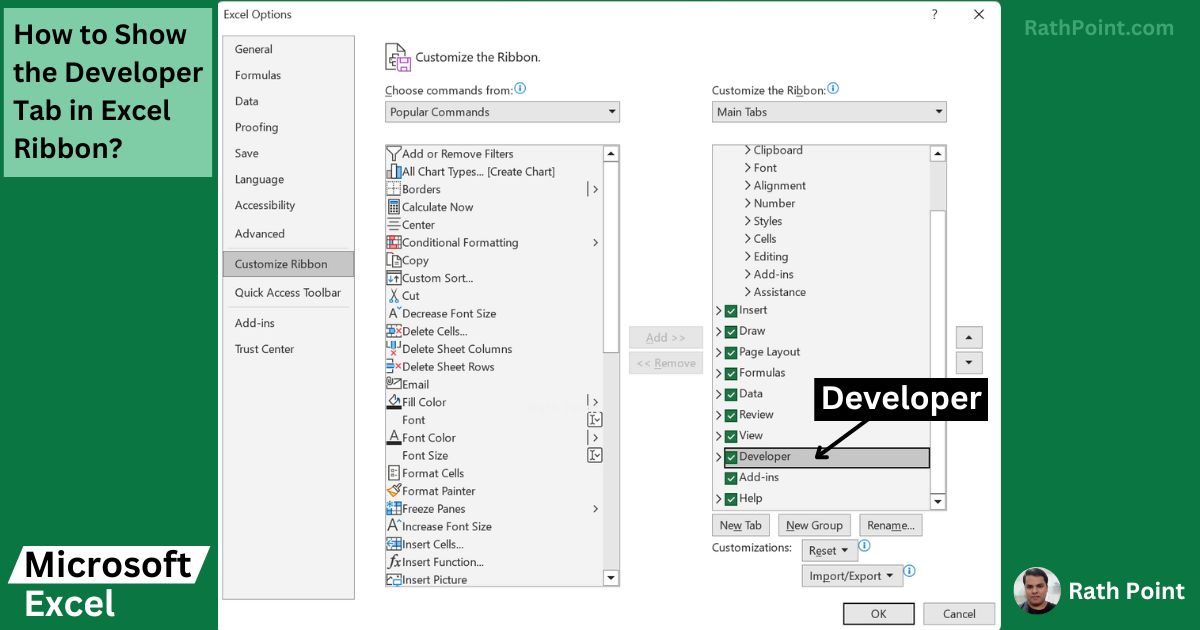
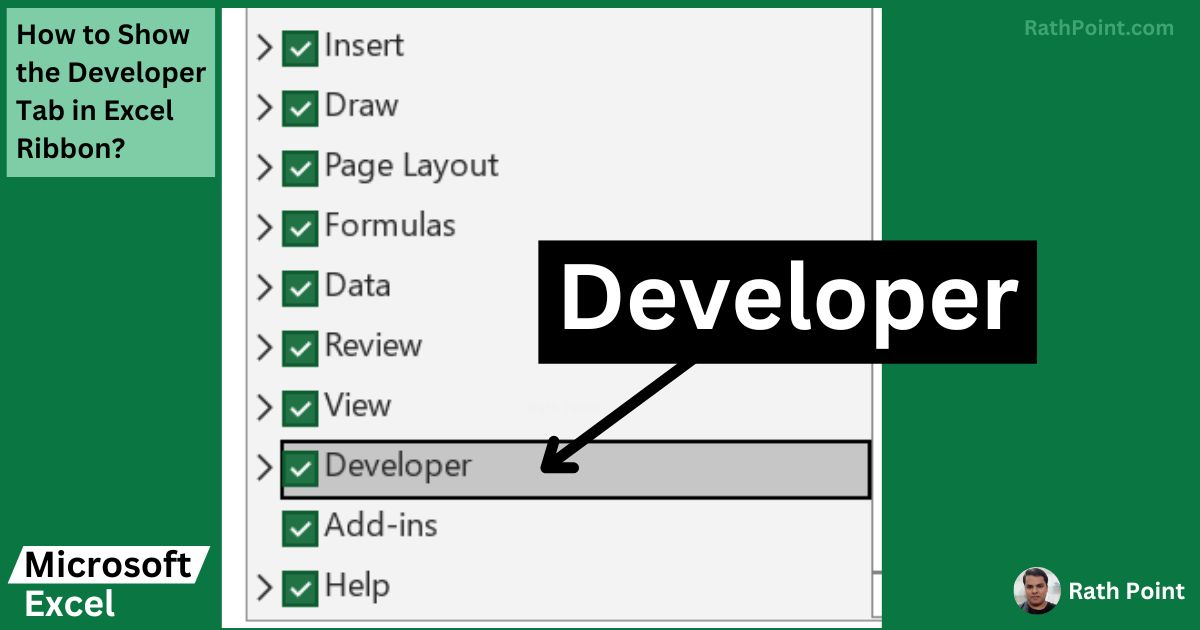
How to Show the Developer Tab in Excel Ribbon?
How to Insert Checkbox in Excel?
If you are creating the Excel checklist then first make sure the list of tasks are ready for which you need the checkboxes to be inserted.
For example, lets create a list for gender in which the options are male or female:
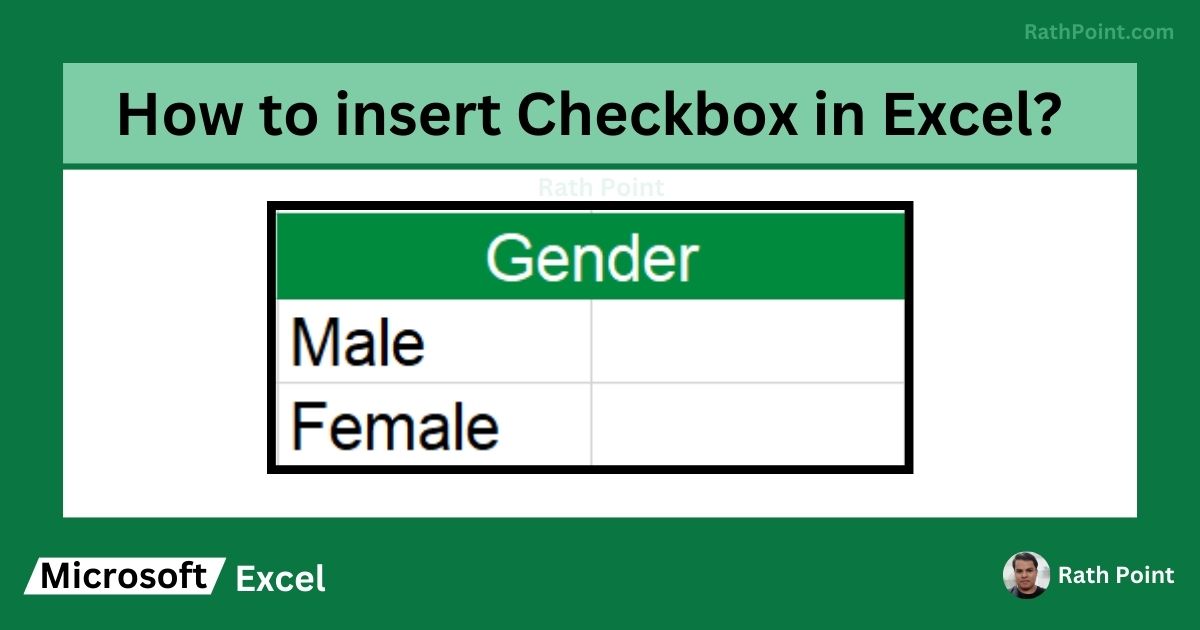
How to Insert Checkbox in Excel?
To insert checkbox in Excel, follow the below steps:
Step 1: Click Check Box
- Go to the Developer Tab → Controls → Insert → From Controls and click on the Check Box.
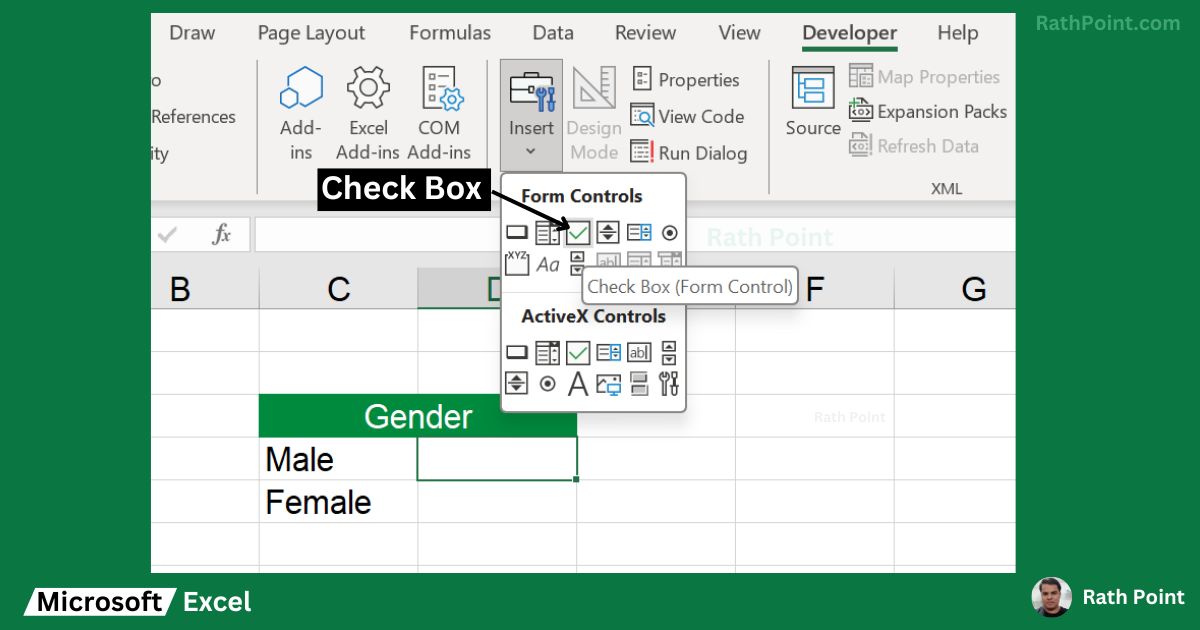
How to Insert Checkbox in Excel (Step 1)
Step 2: Insert and Edit Check Box
- Click on the cell where you want to insert the checkbox and leave the + sign.
- Righ Click on the Checkbox and click on Edit Text. The mouse curser will be visible near the text right to the check box, you can modify or remove the text.
- To remove the text completely, make sure the curser is active, click on delete button untill all the letters are removed and then click outside.
- To position the Check box, Right Click and then Left Click, drag the check box and modify it as per the need.
- Right click on the checkbox and click on copy and paste to make the duplicate checkbox. Right click on the checkbox and click Cut to remove the checkbox in Excel. You can use the copy and paste feature to insert multiple checkboxes in Excel easily.
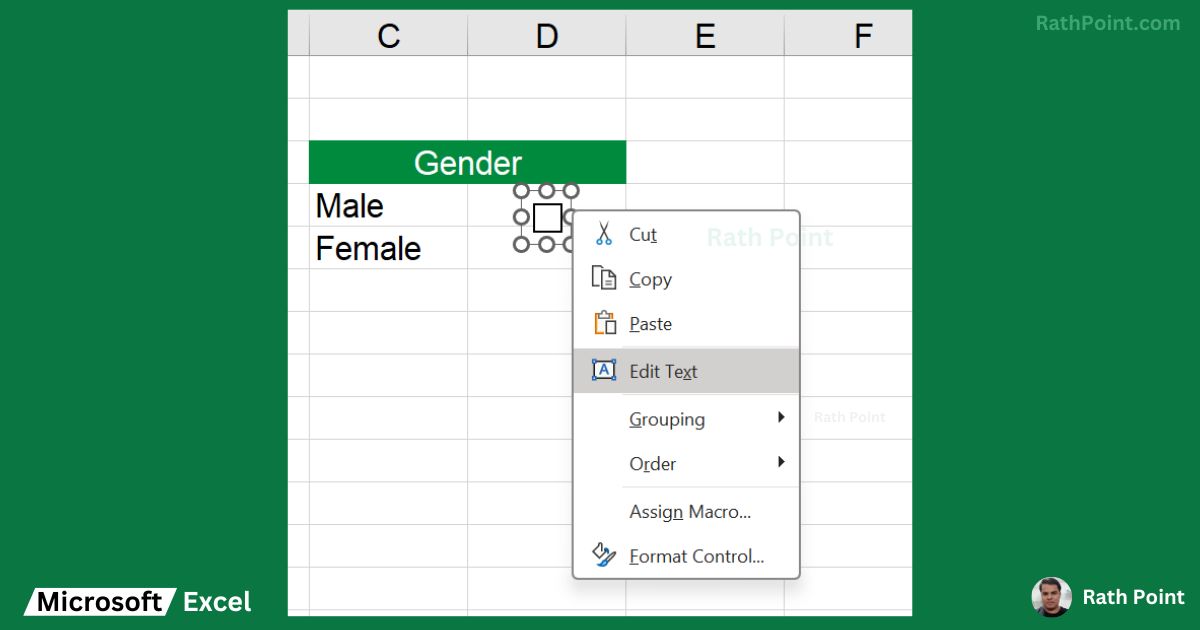
How to Insert a Checkbox in Excel (Step 2)
Step 3: Format Check Box
- If you are not happy with the default checkbox or you are not able to modift the text properly then Right Click on the Checkbox and click on Format Control.
- Colors and Lines: You can modify the color, dashed, style, weight etc.
- Size: You can modify the height and width.
- Protection: You can protect the checkbox.
- Properties: You can control the move and size with cells. Also can define whether to print object or not.
- Alt Text: You can modify the text which appear right side of the checkbox.
- Control: You can control the value, cell link and 3-D shading.
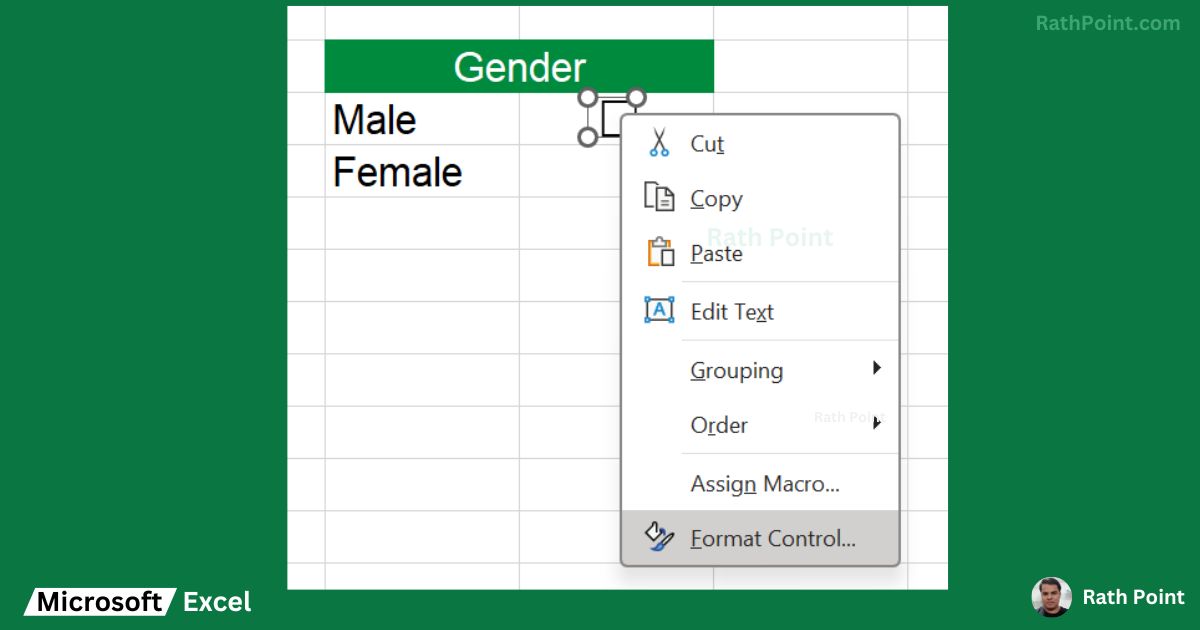
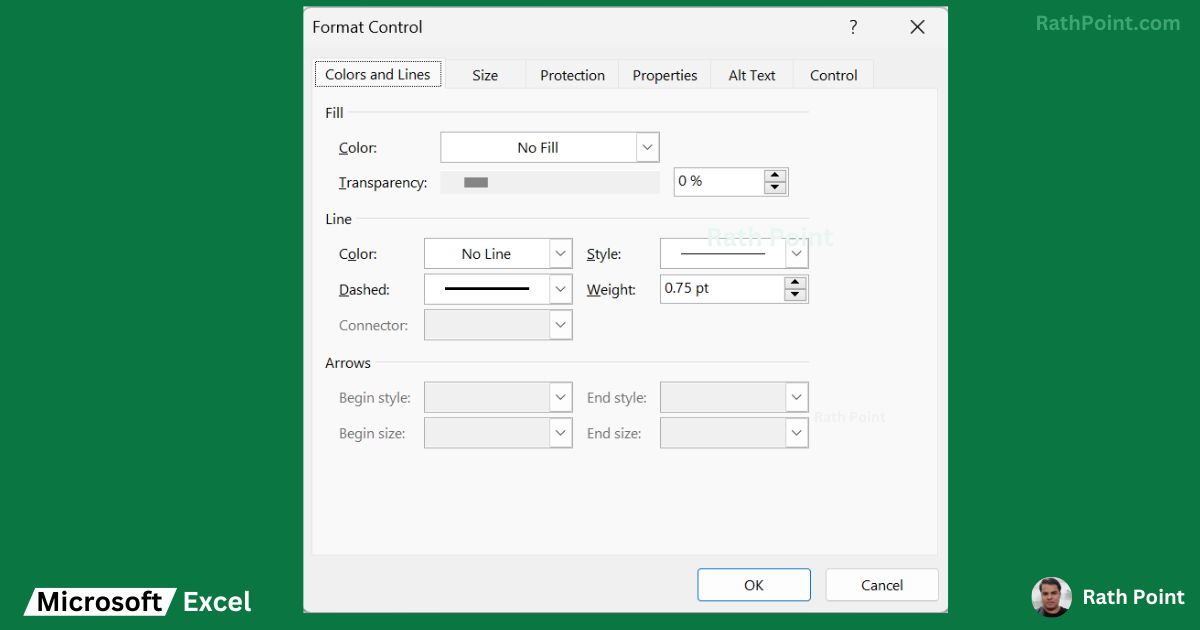
How to Insert a Checkbox in Excel (Step 3)
FAQ
What is Checkbox in Excel?
- The Checkbox in Excel is a part of Form Control in which the user can insert a checkbox with tick and untick option.
- In other words, the Checkbox in Excel is a simple form control that allows the user to decide whether to select and not.
What are the Uses of Checkbox in Excel?
- In general, the Checkboxes are used in interactive files such as forms, surveys, checklist etc.
- The checkboxes are also used in dynamic charts, graphs, and multiple other reports.
How to Delete Checkbox in Excel?
- Right click on the checkbox and click on cut to delete a checkbox in Excel.
- If you want to delete all the checkboxes in Excel then follow the below steps:
- Go to Special: use shortcut key Ctrl+G then click on Special (Home → Editing → Find & Select → Go to Special)
- Objects: Click on Objects and press OK to select all the Checkboxes.
- Delete: Press Delete button from keyboard to delete all the Checkboxes.
How to Link a Checkbox to a Cell in Excel?
- Right click on the Checkbox and select Format Control.
- Go to Control section and provide the cell reference under Cell link.
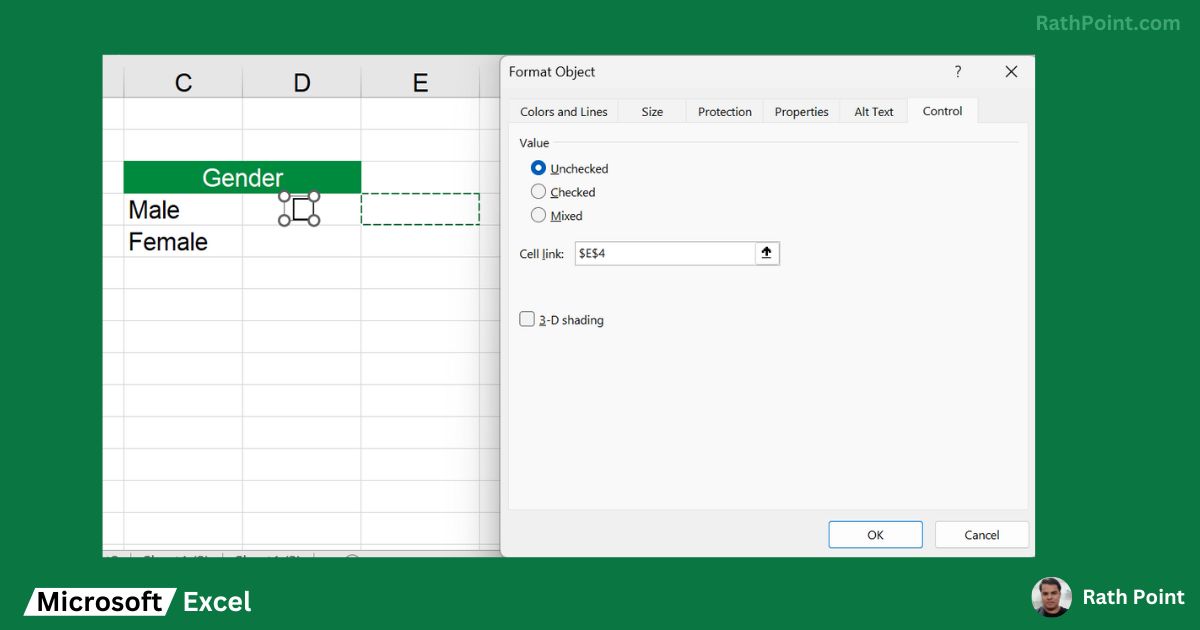
- Type TRUE in the cell reference as per the above image to get the Checkbox ticked automatically. And type FALSE to get the Checkbox unticked.
- If your checkbox is based on value then type the value in the cell link to get the checkbox ticked.
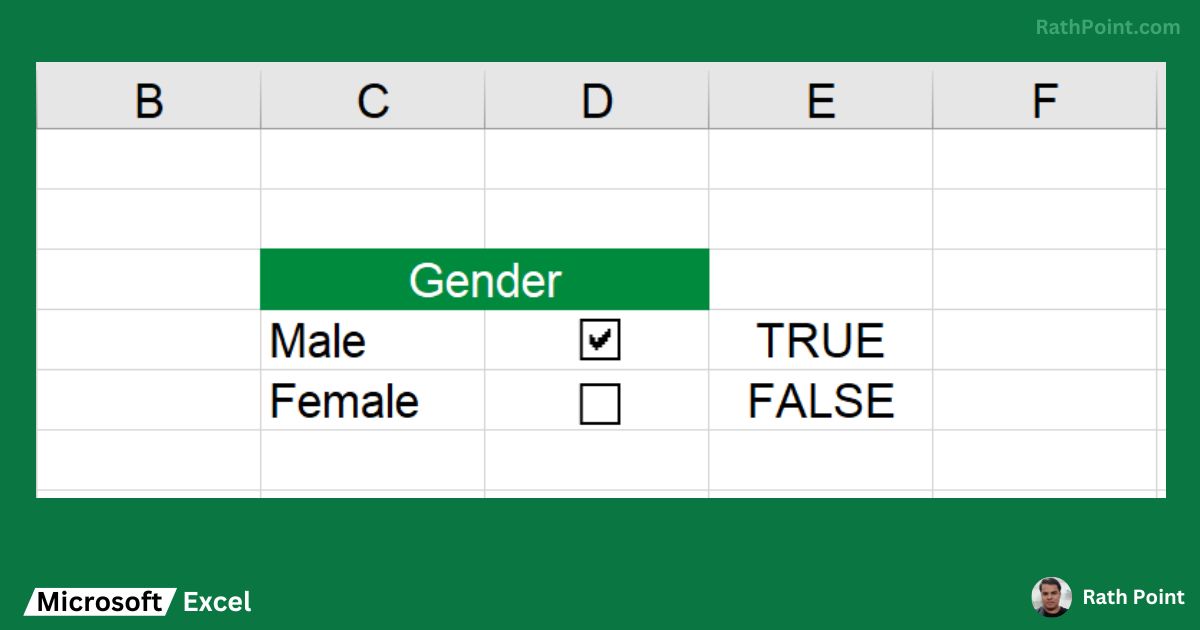
How to Link a Checkbox to a Cell in Excel?
Summary
How to insert checkbox in Excel:
- Go to Developer tab (if not visible, add it in Excel settings).
- Under Form Controls and Insert drop-down, click on Check Box.
- Draw the checkbox in the Excel cell.
THANK YOU
Thank you for learning how to insert checkbox in Excel with Rath Point.
« Excel Tutorial «

How to Insert Checkbox in Excel?
» Excel Home
» Excel Formulas
