How to Sort Data in Excel
This guide will show you how to sort data in Excel, so that you can organize your information neatly into rows and columns. Whether you have names, numbers, or anything else, Excel helps you put everything in order based on what you need. When you sort data, you can quickly see patterns, find what you’re looking for, and make your reports easy to understand. Let’s learn the different ways to sort data in Excel, from basic sorting to more advanced tricks, so you can make the most out of this handy spreadsheet tool.
What is Sorting in Excel?
In Excel, sorting means organizing your data either from smallest to largest or from largest to smallest, for numbers. For text, it’s putting things in alphabetical order, either A to Z or Z to A. If you’re dealing with dates and times, you can sort them from oldest to newest or vice versa. Alos, you can sort the data based on cell color, font color, custom list and conditional formatting icon.
How to Sort Data in Excel in Ascending or Descending Order?
Follow the below steps to sort data in Excel:
- Select Data: Select the data in a cell range or table where you want to apply sorting. In this example, let’s select the cell range from A1 to B7.
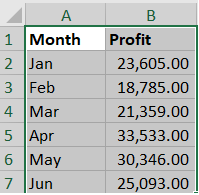
- Sort in Ascending Order: Go to the “Data” tab ⇒ “Sort & Filter” group, click on “A to Z” icon to sort the data in ascending order (lowest to highest).
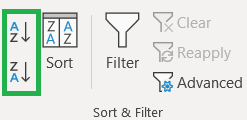
- Sort in Descending Order: You can click on “Z to A” icon to sort the data in descending order (highest to lowest).
By default it will sort the data based on the first column in ascending or descending order. Suppose you have selected only one column and try to sort in ascending order by clicking “A to Z” icon as shown in the below example:
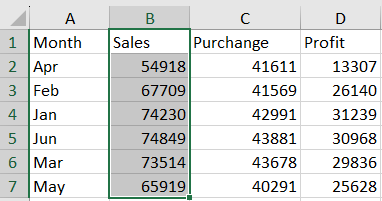
Then, you will get the sort warning message: “Microsoft Excel found data next to your selection. Since you have not selected this data, it will not be sorted”.
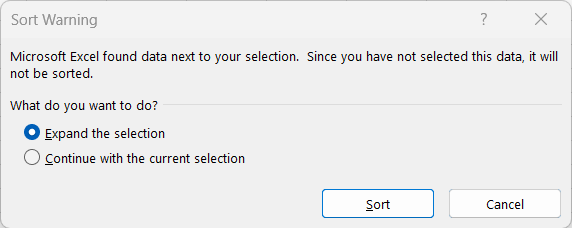
What do you want to do?
- Expand the selection: It will sort all the data in the table or nearby cells. It is selected by default and more appropriate way of sorting.
- Continue with the current selection: It will sort only the selected column without changing other columns.
This is the simple and easy method of sorting data with limited options. Next, let’s learn how to sort data in more advanced way.
How to Sort Data in Excel by Specific Criteria?
Usually, you need to sort data in one column, but sometimes you might want to sort data based on two or more columns. You can use advanced sorting features in Excel to arrange your data based on multiple columns at once. Follow the below steps to sort data in Excel by specific criteria and multiple columns:
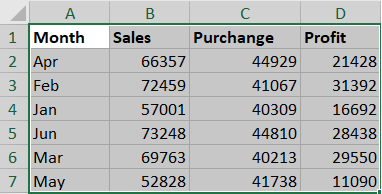
- Select Data: Select all the data in a cell range or table where you want to apply sorting based on specific conditions. In this example, let’s select the cell range from A1 to D7.
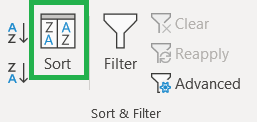
- Sort Icon: Go to the “Home” tab on the Excel ribbon, click on the “Sort” icon in the “Sort & Filter” group to get the “Sort” dialog box.
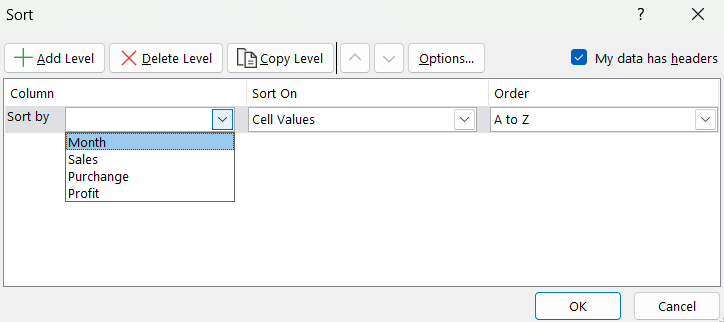
- Sort By: Select the “Sort by” option by selecting from the drop down. If you have ticked “My data has header” then it will automatically display the headers. In this example, let’s select the “Month” under the “Sort by” dropdown list.
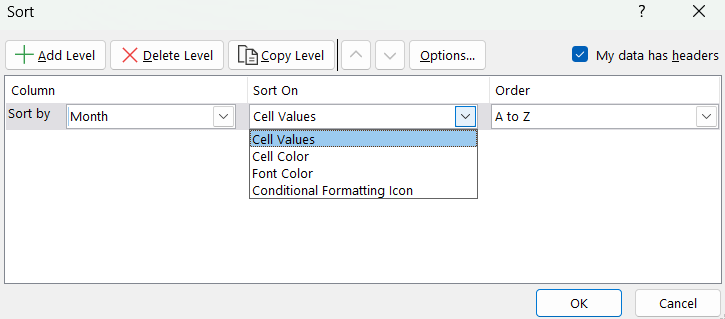
- Sort On: The default “Sort On” option is based on cell values. The other “Sort On” options are cell color, font color and conditional formatting icon.
- Sort Order: You can select the sorting order as A to Z, Z to A or based on custom list.
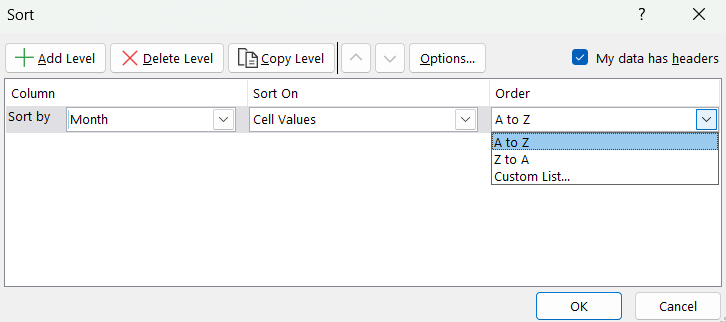
- Custom Lists (Optional): In Excel, there are some predefined custom list. If you want to add new list then update under “List entries” with comma and space as separator. Let’s add the new custom list “High, Middle, Low” as shown in the below example. Then click “Add” and “OK” to sort based on the custom list.
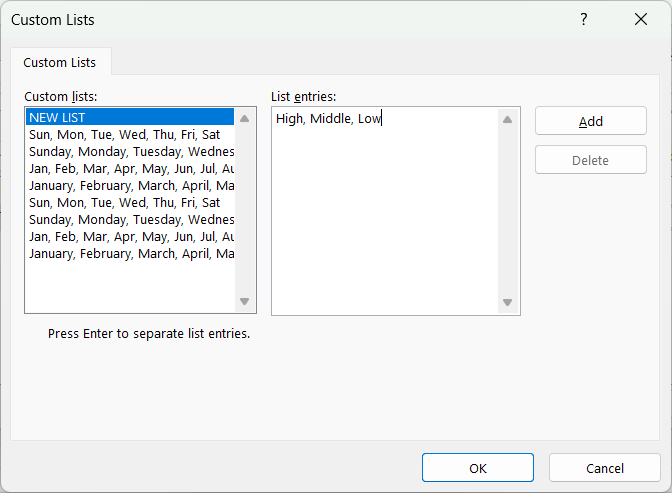
- Add Level: You can add multiple levels of sorting by clicking on “Add Level” button. In the below example, the data will be sorted by month and then by Sales.
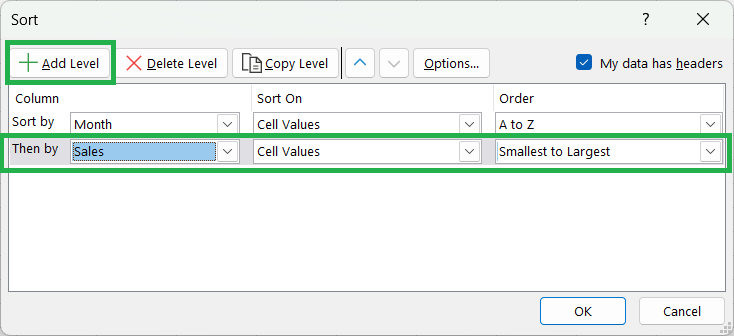
- Delete, Copy or Move Level: You can also delete any level, copy level, and move any level up or down.
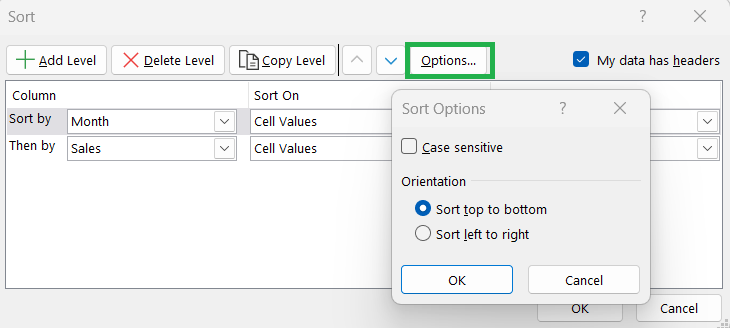
- Sort Options: If you want use case sensitive and change orientation then click on the “Options” in the “Sort” dialog box. Under the orientation option, you can choose either “Sort top to bottom” or “Sort left to right”. By default the “Case sensitive” is unticked and “Sort top to bottom” is selected.
- Apply Sorting: After you have defined all the sorting criteris, click “OK” to sort the data and close “Sort” dialog box. Later, if you want to change the sorting then follow the steps from staring again. Click Ctrl + Z to undo the sorting (because even if you delete all the levels in “Sort” dialog box, it will not remove already applied sorting).
How to Sort Data in Excel using Shortcuts?
Below are the keyboard shortcut keys to sort data in Excel:
Conclusion
In Excel, knowing how to sort data is super important. It helps you organize your spreadsheets better and understand your information more easily. You can sort data like numbers, words, dates, or even use your own custom criteria. Just make sure you pick the right range of data and choose the right order for sorting to get accurate results.
Learn More
» How to use Conditional Formatting in Excel?
» How to Add Borders in Excel?
» How to Format Numbers in Excel?
» How to Format Font in Excel?
» How to Format Alignment in Excel?

Excel Tutorial Part 1 (Basic)
» Excel Home
» Excel Basics
» Excel Workbook
» Excel Template
» Excel Cell
» Excel Password
Excel Tutorial Part 2 (Format)
» Excel Clipboard
» Excel Format Font
» Excel Format Alignment
» Excel Format Number
» Excel Border
» Excel Conditional Formatting
Excel Tutorial Part 3 (Data)
» Excel Sort Data
» Excel Filter Data
» Excel Text to Columns
» Excel Data Validation
» Excel Flash Fill
» Excel Remove Duplicates
» Excel Relationships
» Excel Consolidate
» Excel What-If Analysis
» Excel Group
» Excel Charts
» Excel Table
» Excel PivotTable
Excel Tutorial Part 4 (Find)
» Excel Find and Replace
» Excel Go To
» Excel Select Objects
» Excel Selection Pane
Excel Tutorial Part 5 (Review)
» Excel Spell Check
» Excel Smart Lookup
» Excel Translate
» Excel Comments & Notes
» Excel Protect
» Excel Hide Ink
Excel Tutorial Part 6 (View)
» Excel Workbook Views
» Excel Formula Bar
» Excel Zoom
» Excel Window
» Excel Macros
Excel Tutorial Part 7 (Fx)
» Excel Formulas (Category)
» Excel Formulas (Alphabetical)
» Excel Errors
» Excel Name Manager
» Excel Formula Auditing
» Excel Watch Window
» Excel Calculation Options
Excel Tutorial Part 8 (Other)
» Excel Add-ins
» Excel Shortcuts

0 Comments