How to Select all Objects in Excel (4 ways)
This guide will show you how to select all objects in Excel in 4 different ways. Selecting all objects in Excel is helpful for doing multiple tasks at a time such as formatting, moving, or deleting multiple items at once. The objects in Excel include shapes, text boxes, ink, charts, images, icons etc. The Excel Select Object is especially useful with objects that are behind the text or hidden within rows and columns.
Method 1: How to Select all Objects in Excel using Select Objects?
- Go to Home tab in the ribbon.
- Navigate to Editing section and click on Find & Select.
- From the drop down, click on Select Objects button.
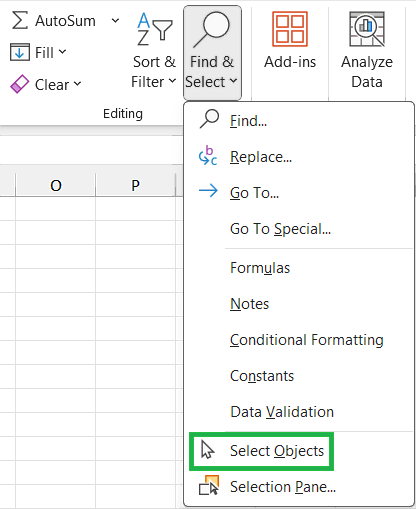
- You have to click and drag your mouse over the area where your objects are in the Excel Sheet.
- This will create a selection box, and all objects inside this box will be selected.
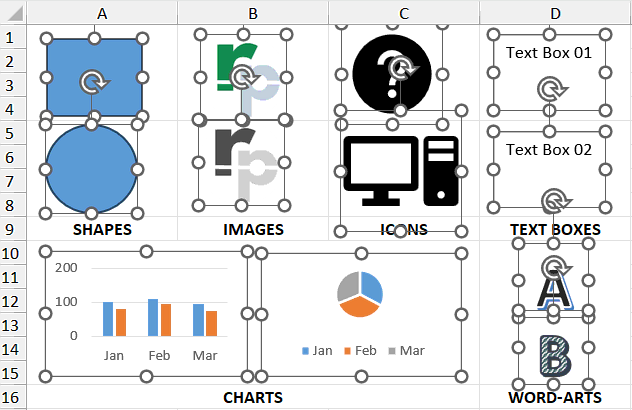
- After selecting all objects, you can copy, move, resize etc of all objects at a time.
- Once done press Esc to cancel the object selection.
Method 2: How to Select all Objects in Excel using Go To Special?
- Go to Home tab in the ribbon.
- Navigate to Editing section and click on Find & Select.
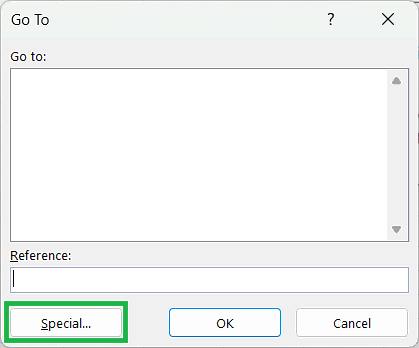
- From the drop down, click on Go To Special button. Or click on Go To button and select Special.
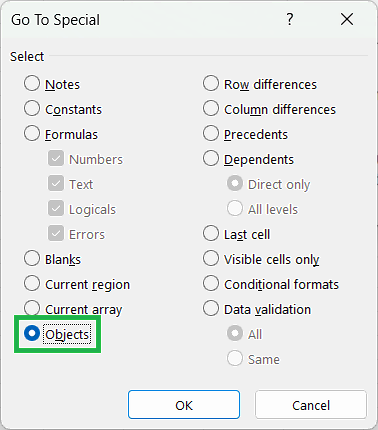
- In the Go To Special dialog box, choose Objects and click OK.
- This will select all the objects in the worksheet.
Method 3: How to Select all Objects in Excel using Selection Pane?
- Go to Home tab in the ribbon.
- Navigate to Editing section and click on Find & Select.
- From the drop down, click on Selection Pane button.
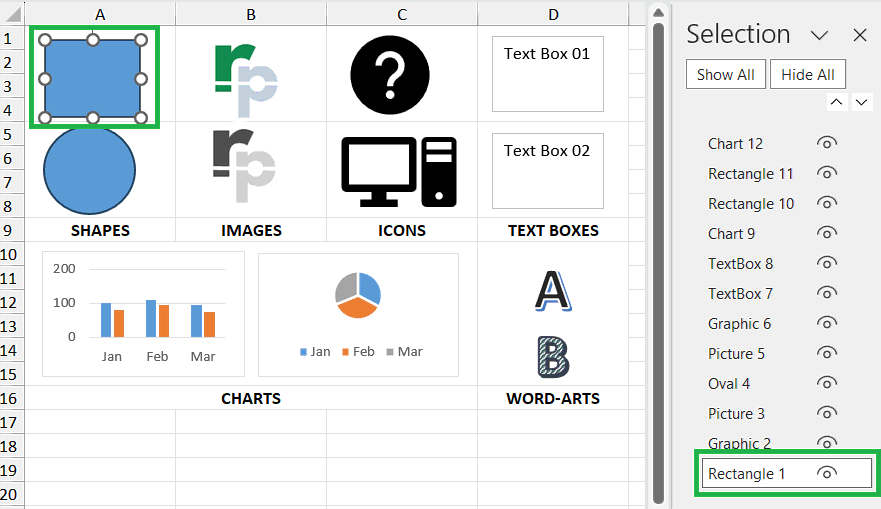
- The Selection Pane will be visible on the right-hand side and you will find a list of all the objects in the Microsoft Excel worksheet. This makes it easier to select objects, change their order or visibility.
- Click on any object to select it. In this example we have selected Rectangle 1 to select the first object.
- From the Selection Pane, select one object and hold the Ctrl key to select all the objects one by one.
- In the Selection Pane, click on the eye button to on or off the visibility of any object.
Method 4: How to Select all Objects in Excel Shortcut Key?
- To select all objects in Excel shortcut key, first select any object and then press Ctrl+A from the keyboard.
- To select multiple objects in Excel shortcut key, first select one object and then hold Ctrl key to select the multiple objects.
Tips for Objects in Excel
- Types of Objects: Understand all the objects in Excel and how they are used. Some of the objects are shapes, images, text boxes, charts, ink and icon.
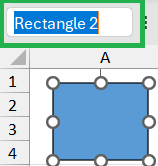
- Name for Objects: Define a name for each object to access and select easily. To do that, select the object and enter the name as shown below.
- Grouping Objects: After selecting the objects, you can treat them as one by grouping them. To do that, right-click on the selected objects and click on Group.
- Aligning Object: To align multiple objects relative to each other, select the objects and use the alignment options under the Format tab. For example, to align a shape, select the shape, go to Shape Format tab, click on Align under Arrange section.
- Deleting Objects: To delete all objects in Excel, first select all the objects and then press the Delete key from the keyboard. You can also remove one or multiple objects in Excel by selecting the objects and pressing the Backspace key.
Conclusion
Whether you’re dealing with shapes, charts, images, or other elements, using shortcuts like Ctrl+A to select the whole worksheet or F5 (Go To Special) to pick specific objects can save you time and improve accuracy. Selecting all objects in Excel can boost your productivity and make data management easier. Learning these tricks helps you organize, format, and create more effective presentations of shapes in Excel.
Learn More
» How to Count Uppercase Letters in Excel?
» How to Count Lowercase Letters in Excel?
» How to use Go To in Excel?
» How to create Relationship in Power Pivot?
» How to use What-If Analysis in Excel?
» How to use Advanced Filter in Excel?
» How to create a Relationship between Tables in Excel?

Excel Tutorial Part 1 (Basic)
» Excel Home
» Excel Basics
» Excel Workbook
» Excel Template
» Excel Cell
» Excel Password
Excel Tutorial Part 2 (Format)
» Excel Clipboard
» Excel Format Font
» Excel Format Alignment
» Excel Format Number
» Excel Border
» Excel Conditional Formatting
Excel Tutorial Part 3 (Data)
» Excel Sort Data
» Excel Filter Data
» Excel Text to Columns
» Excel Data Validation
» Excel Flash Fill
» Excel Remove Duplicates
» Excel Relationships
» Excel Consolidate
» Excel What-If Analysis
» Excel Group
» Excel Charts
» Excel Table
» Excel PivotTable
Excel Tutorial Part 4 (Find)
» Excel Find and Replace
» Excel Go To
» Excel Select Objects
» Excel Selection Pane
Excel Tutorial Part 5 (Review)
» Excel Spell Check
» Excel Smart Lookup
» Excel Translate
» Excel Comment
» Excel Protect
» Excel Hide Ink
Excel Tutorial Part 6 (View)
» Excel Workbook Views
» Excel Show
» Excel Zoom
» Excel Window
» Excel Macros
Excel Tutorial Part 7 (Fx)
» Excel Formulas (Category)
» Excel Formulas (Alphabetical)
» Excel Errors
» Excel Name Manager
» Excel Formula Auditing
» Excel Watch Window
» Excel Calculation Options
Excel Tutorial Part 8 (Other)
» Excel Add-ins
» Excel Shortcuts

0 Comments