How to create a Relationship between Tables in Excel
This guide will show you how to create a relationship between tables in Excel step by step. Creating relationships between tables in Excel helps you analyze data more efficiently by connecting tables through common fields, similar to a relational database. This is especially helpful when working with large datasets from different sources.
How to create a Relationship between Tables in Excel (step by step)
Follow the below steps to create a relationship between two tables in Excel:
Step 1: Organize Data into Tables
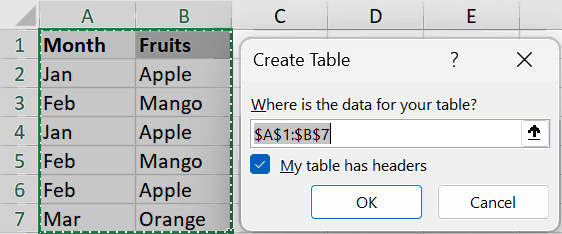
Ensure your data is organized into tables with a unique name and a header row containing column names. To convert data ranges to tables:
- Select the cells containing the data.
- Go to Insert tab and click Table under Tables section.

- In the Create Table dialog box, confirm the cell range is correct under where is the data for your table. Also, make sure “My table has headers” is ticked. Then click OK.
Step 2: Define Table Names
Assigning names to your tables helps in easily identifying them when setting up relationships. To name your tables:
- Click anywhere on the table.
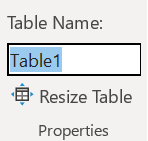
- Go to the Table Design tab and find Table Name under Propertiies section.
- By default the first table name is Table1 and you can modify the same based on your need.
Step 3. Create Multiple Tables
- There should be minimum 2 tables to create the relationship between them.
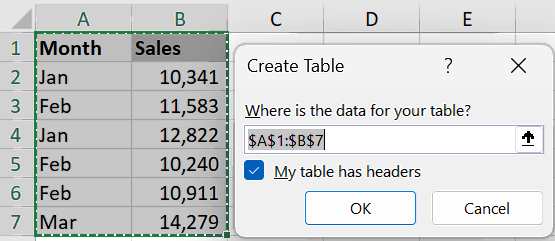
- Follow the Step 1 and 2 for the second table.
- By default the second table name will be Table2 and you can rename it.
Step 3. Access Relationships Button
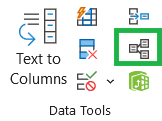
- Go to the Data tab on the Ribbon.
- Click the “Relationships” button in the “Data Tools” section.
Step 4. Manage Relationships
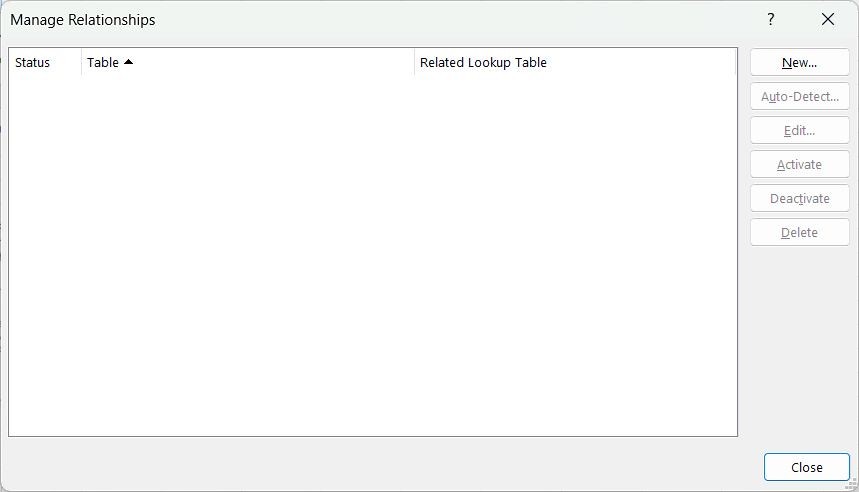
- In the “Manage Relationships” dialog box, click New to create relationships between tables in Excel.
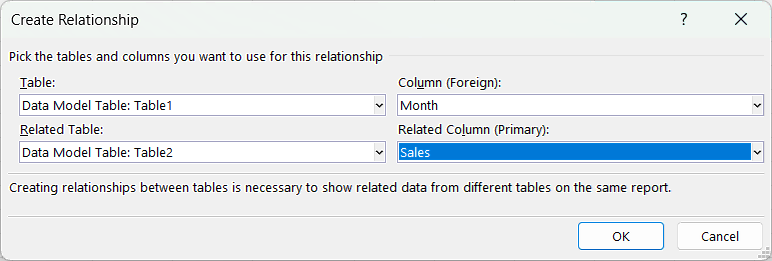
- In the “Create Relationships” dialog box, select the tables and relates table in the first column. Then select the column (foreign) and relates column (primary) in the next columns.
- Creating relationships between tables in necessary to show relates data from different tables on the same report.
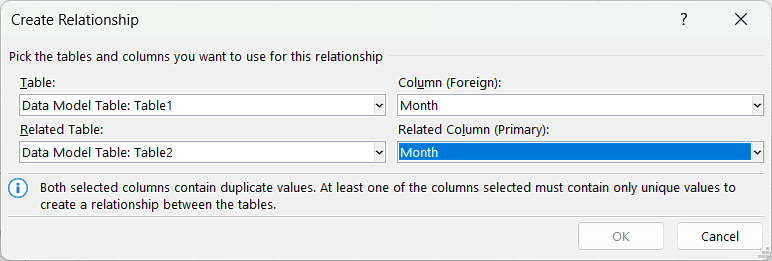
- If you select same column in both the tables (same in column and relates column) then you will get the below error message:
Both selected columns contain duplicate values. At least one of the columns selected must contain only unique values to create a relationship between the tables
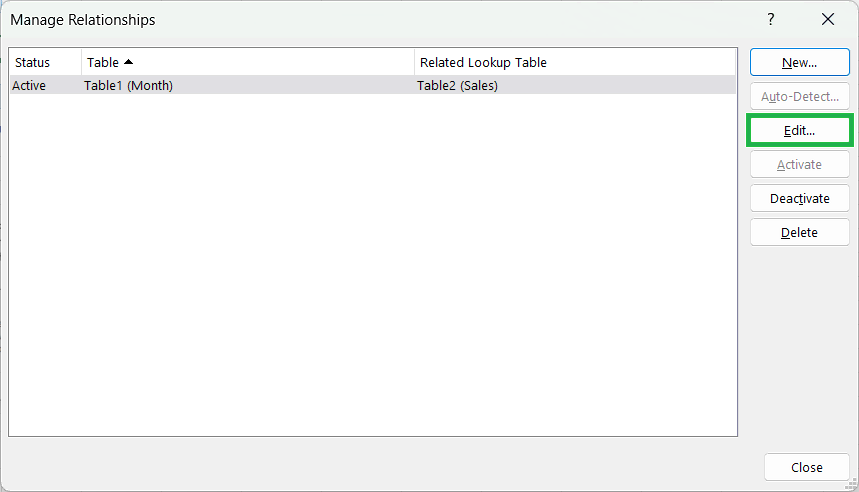
- After you have created the relationship between two tables in Excel, you can follow the Step 2 and click on Edit in the Manage Relationships dialog box to modify the relationship between the tables.
- You can also add new relationships, deactivate or delete relationships between tables in Excel.
- Close the Manage Relationships dialog box once you have made the relationships between the tables in Microsoft Excel.
How to create a Relationship between Tables in Excel on Mac?
In Mac, the Relationships feature is not available in Microsoft Excel. So, its not possible to create a relationship between tables on Mac Excel. Whereas, you can combine data from multiple tables on Mac Excel.
How to create a Relationship between Tables in Excel using Shortcut?
Below is the keyboard shortcut key to create relationships in Excel between tables:
Conclusion
Understanding and using the Relaionships feature improves data organization and enhances your ability to analyze data. Linking tables in Excel helps you to manage and analyze complex data more efficiently. You can also create relationship between tables in Power Pivot for Excel.
Learn More
» How to create Relationship in Power Pivot?
» How to use Data Validation in Excel?
» How to use Text to Columns in Excel?
» How to Filter Data in Excel?
» How to use Advanced Filter in Excel?
» How to Sort Data in Excel?
2 Comments
Submit a Comment

Excel Tutorial Part 1 (Basic)
» Excel Home
» Excel Basics
» Excel Workbook
» Excel Template
» Excel Cell
» Excel Password
Excel Tutorial Part 2 (Format)
» Excel Clipboard
» Excel Format Font
» Excel Format Alignment
» Excel Format Number
» Excel Border
» Excel Conditional Formatting
Excel Tutorial Part 3 (Data)
» Excel Sort Data
» Excel Filter Data
» Excel Text to Columns
» Excel Data Validation
» Excel Flash Fill
» Excel Remove Duplicates
» Excel Relationships
» Excel Consolidate
» Excel What-If Analysis
» Excel Group
» Excel Charts
» Excel Table
» Excel PivotTable
Excel Tutorial Part 4 (Find)
» Excel Find and Replace
» Excel Go To
» Excel Select Objects
» Excel Selection Pane
Excel Tutorial Part 5 (Review)
» Excel Spell Check
» Excel Smart Lookup
» Excel Translate
» Excel Comments & Notes
» Excel Protect
» Excel Hide Ink
Excel Tutorial Part 6 (View)
» Excel Workbook Views
» Excel Formula Bar
» Excel Zoom
» Excel Window
» Excel Macros
Excel Tutorial Part 7 (Fx)
» Excel Formulas (Category)
» Excel Formulas (Alphabetical)
» Excel Errors
» Excel Name Manager
» Excel Formula Auditing
» Excel Watch Window
» Excel Calculation Options
Excel Tutorial Part 8 (Other)
» Excel Add-ins
» Excel Shortcuts

great
Thanks