How to create Relationship in Power Pivot
This guide will show you how to create relationship in Power Pivot in Excel step by step. Creating relationships between tables in Power Pivot helps you analyze data more efficiently by connecting tables through common fields, similar to a relational database. This is especially helpful when working with large datasets from different sources.
How to create Relationship in Power Pivot (step by step)
You can easily create relationship between two tables in excel using Power Pivot. Follow the below steps to create relationship in Power Pivot:
Step 1: Create Tables
- Select the cells containing the data. Go to Insert tab and click Table under Tables section to create a table.
- In Microsoft Excel, there should be minimum 2 tables to create relationship in Power Pivot.

Step 1: Define Table Names
- Click anywhere on the table.
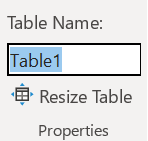
- Go to the Table Design tab and find Table Name under Propertiies section.
- By default the first table name is Table1 and you can change it.

Step 3. Go to the Power Pivot Window
- Go to the Data tab on the Ribbon.
- Click the “Go to the Power Pivot Window” button in the “Data Tools” section.

Or
- Click anywhere on one of the Table.
- Go to the “Power Pivot” tab on the Ribbon. Click the “Manage” button in the “Data Model” section.

Step 4. Create and Manage Relationships
- In Power Pivot for Excel, go to Design tab and click the “Create Relationship” button.
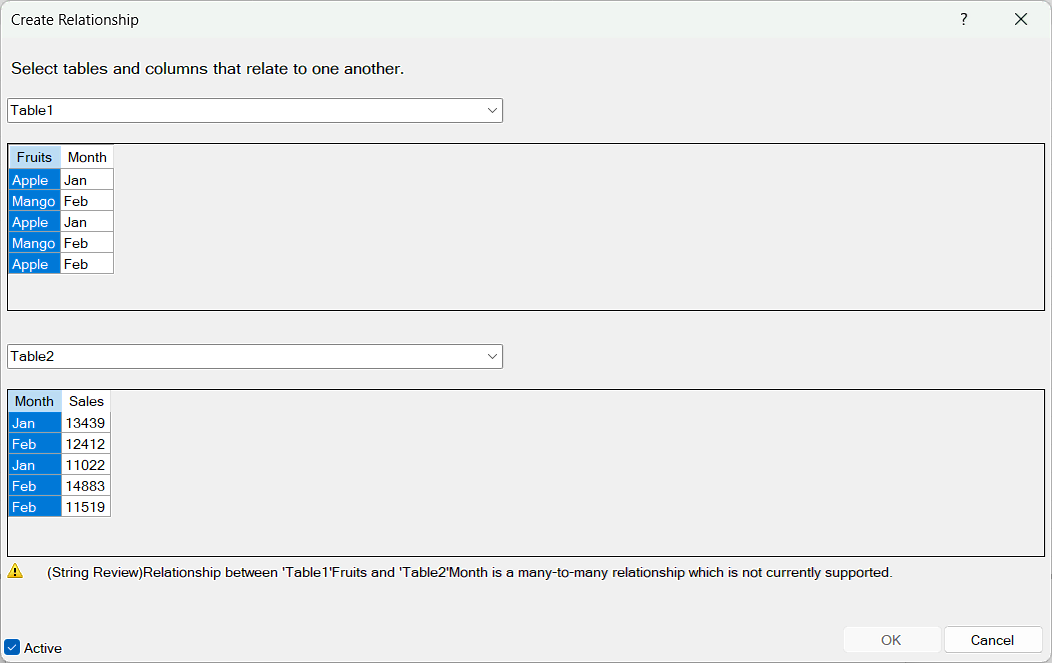
- Select tables and columns that relate to one another. Select the table from drop down list and click the column to select. The selected columns will be highlighed in blue as show below.
- Then click OK to create relationship between tables in Power Pivot for Excel.

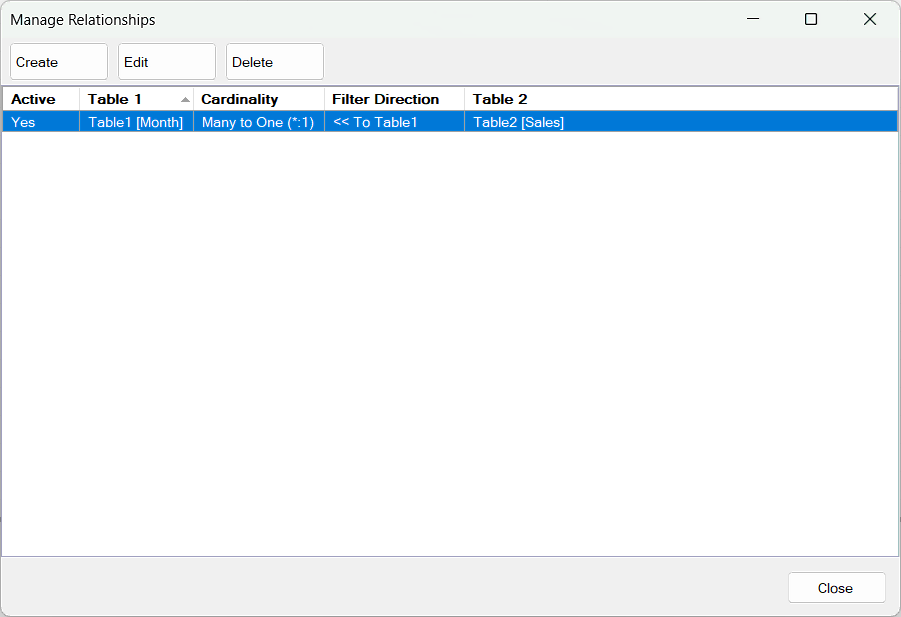
- Go to Design tab and click the “Manage Relationships” button to create, edit or delete the relationships.
- Click Close once done.

- If you select same column in both the tables then you will get the below error message:
(String Review) Relationship beween ‘Table1’Fruits and ‘Table2’Month is a many-to-many relationship which is not currently supported.

Step 4. Diagram View Relationships (Optional)
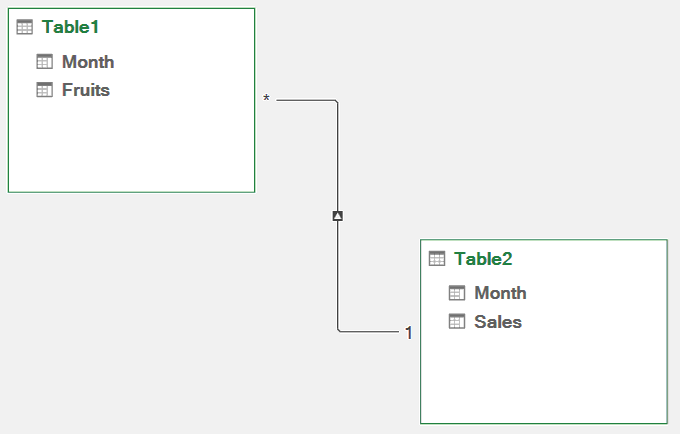
- In Power Pivot for Excel, go to Home tab and click the “Diagram View” button under View section.

- It will show the diagram view of relationship between two tables in Excel which you have created.

How to create Relationship in Power Pivot for Excel on Mac?
In macOS version of Excel, the Power Pivot Relationship feature is not available. So, its not possible to create a relationship between tables in Power Pivot on Mac Excel.
How to create Relationship in Power Pivot using Shortcut?
Below is the keyboard shortcut key to create relationship in Power Pivot for Excel:
Conclusion
By creating relationships in Power Pivot for Excel, you can easily analyze complex datasets in one place. This involves matching related columns, understanding how tables are connected, and using Power Pivot’s simple drag-and-drop feature in Excel. You can also easily create a relationship between tables in Excel without Power Pivot.
Learn More
» How to create a Relationship between Tables in Excel?
» How to use Data Validation in Excel?
» How to use Text to Columns in Excel?
» How to Filter Data in Excel?
» How to use Advanced Filter in Excel?
» How to Sort Data in Excel?

Excel Tutorial Part 1 (Basic)
» Excel Home
» Excel Basics
» Excel Workbook
» Excel Template
» Excel Cell
» Excel Password
Excel Tutorial Part 2 (Format)
» Excel Clipboard
» Excel Format Font
» Excel Format Alignment
» Excel Format Number
» Excel Border
» Excel Conditional Formatting
Excel Tutorial Part 3 (Data)
» Excel Sort Data
» Excel Filter Data
» Excel Text to Columns
» Excel Data Validation
» Excel Flash Fill
» Excel Remove Duplicates
» Excel Relationships
» Excel Consolidate
» Excel What-If Analysis
» Excel Group
» Excel Charts
» Excel Table
» Excel PivotTable
Excel Tutorial Part 4 (Find)
» Excel Find and Replace
» Excel Go To
» Excel Select Objects
» Excel Selection Pane
Excel Tutorial Part 5 (Review)
» Excel Spell Check
» Excel Smart Lookup
» Excel Translate
» Excel Comments & Notes
» Excel Protect
» Excel Hide Ink
Excel Tutorial Part 6 (View)
» Excel Workbook Views
» Excel Formula Bar
» Excel Zoom
» Excel Window
» Excel Macros
Excel Tutorial Part 7 (Fx)
» Excel Formulas (Category)
» Excel Formulas (Alphabetical)
» Excel Errors
» Excel Name Manager
» Excel Formula Auditing
» Excel Watch Window
» Excel Calculation Options
Excel Tutorial Part 8 (Other)
» Excel Add-ins
» Excel Shortcuts

0 Comments