How to Translate Text in Excel
This guide will show you how to translate text in Excel. The translate feature in Excel helps you to change content from one language to another right in your spreadsheet. This feature is handy globally where your data needs to be understood by people from various locations. When you are dealing with international business, working with multilingual data, or collaborating with teams in other regions, the Microsoft Excel’s translation tools make your work easier and faster.
Steps: How to Translate Text in Excel?
Step 1: Select the Cell or Range
- Select the cell where you want to use the Translator.
- You can also select the range of cells that you want to translate.
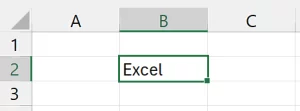
- In this example, click the cell B2.
Step 2: Navigate to Translate
- Go to the Review tab on the Ribbon and click Translate in the Language group.
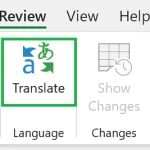
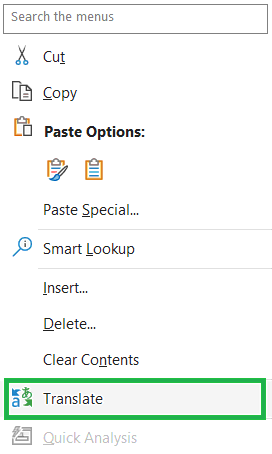
- Alternatively, right click on the cell or the selected text and select Translate. The shortcut key for translate text in Excel is Alt + R + L.
Step 3: Select Translate To
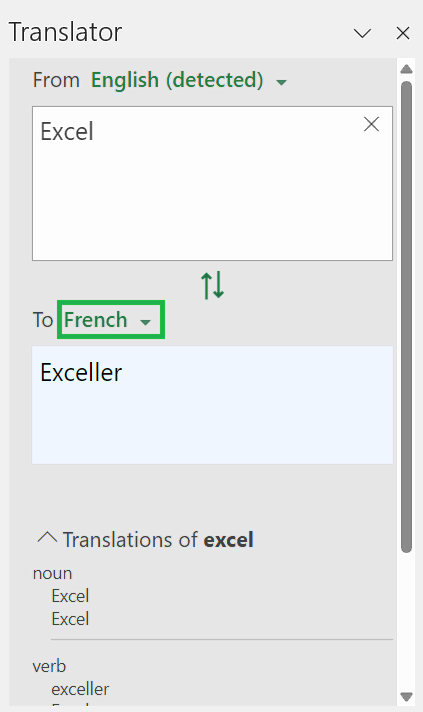
- A Translator panel will appear on the right side of the Excel.
- It will auto detect the language you are translating from, but if you feel it is not correct then you can change it. You can also type the text or paste the text in this box.
- Select the language you are translating to within the drop-down list.
- The Excel will translate the text automatically within the spreadsheet. It will show the translations of the text on the below, based on word classes such as noun, verb, adverb, and adjective.
Step 4: Replace the Text
- Copy the text in the Translate To box and paste the in required cell, which you have translated.
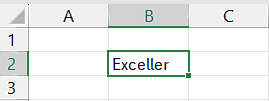
- In this example, the text in cell B2 translated from English (Excel) to French (Exceller). So, copy the text Exceller and paste in cell B2.
What is the Shortcut key for Translate in Excel?
Below is the keyboard shortcut key to translate text in Excel:
Conclusion
The Translate in Excel lets you easily translate text directly in your spreadsheets. This feature helps you to save time and effort by letting you easily manage data in different languages.
Learn More
» How to use Smart Lookup in Excel?
» How to Spell Check in Excel?
» How to use Selection Pane in Excel?
» How to Select all Objects in Excel?
» How to use Go To in Excel?
» How to use Find and Replace in Excel?
» How to Count Uppercase Letters in Excel?
» How to Count Lowercase Letters in Excel?
» How to create Relationship in Power Pivot?
» How to Create a Table in Excel?
» How to Create a Pivot Table in Excel?
» How to create a Relationship between Tables in Excel?
» How to use Advanced Filter in Excel?
» How to use What-If Analysis in Excel?

Excel Tutorial Part 1 (Basic)
» Excel Home
» Excel Basics
» Excel Workbook
» Excel Template
» Excel Cell
» Excel Password
Excel Tutorial Part 2 (Format)
» Excel Clipboard
» Excel Format Font
» Excel Format Alignment
» Excel Format Number
» Excel Border
» Excel Conditional Formatting
Excel Tutorial Part 3 (Data)
» Excel Sort Data
» Excel Filter Data
» Excel Text to Columns
» Excel Data Validation
» Excel Flash Fill
» Excel Remove Duplicates
» Excel Relationships
» Excel Consolidate
» Excel What-If Analysis
» Excel Group
» Excel Charts
» Excel Table
» Excel PivotTable
Excel Tutorial Part 4 (Find)
» Excel Find and Replace
» Excel Go To
» Excel Select Objects
» Excel Selection Pane
Excel Tutorial Part 5 (Review)
» Excel Spell Check
» Excel Smart Lookup
» Excel Translate
» Excel Comments & Notes
» Excel Protect
» Excel Hide Ink
Excel Tutorial Part 6 (View)
» Excel Workbook Views
» Excel Formula Bar
» Excel Zoom
» Excel Window
» Excel Macros
Excel Tutorial Part 7 (Fx)
» Excel Formulas (Category)
» Excel Formulas (Alphabetical)
» Excel Errors
» Excel Name Manager
» Excel Formula Auditing
» Excel Watch Window
» Excel Calculation Options
Excel Tutorial Part 8 (Other)
» Excel Add-ins
» Excel Shortcuts

0 Comments